mardi 28 avril 2015

By the sea - SATW Video tutorial

Bonjour à toutes,

Voici une nouvelle page pour Scrap Around the World avec un petit bonus

Hello Sweeties,

Here is my new layout for Scrap Around the World with a little bonus.

(Photo : Yair Hazout)


Et voici le magnifique tableau d'inspiration que nous a concocté Hera Sugitani.

This layout was inspired by the beautiful Mood board created by Hera Sugitani. 

J'ai été inspirée par le thème de la mer, avec ses coquillages, les hippocampes, mais également la couleur...

Iwas inpired by the sea theme, with the sea shells, the sea horses, and also the color...
J'ai fait une vidéo qui vous montre comment j'ai réalisé cette page. Mais avant quelques gros plans :

I realized a video showing how I made this layout. But first some close-ups:


J'ai utilisé différents produits pour varier les textures des divers chipboards.

I varied the products I used to achieved both a high & low gloss finish on the chipboard embellishments.


Et voici la vidéo :

And here is the video:


Matériels / Materials:
  • Papiers / Papers - Maja Design: 
    • Vintage Spring Basics - 5th of March, 
    • Vintage Frost Basics - 21st of December, 
    • Vintage Autmn Basics - N°  VIII, N° XI,
  • Twinkling H2Os - ColourArte (Azurite, Bolivian Blue, Majestic, Wild Plum, Smokey Diamond) ;
  • Primary Element - ColourArte (Black Emerald) ;
  • Encre en spray / Spray Ink - Vibez Shimmerz (Hot Fudge)
  • Pochoirs / Stencils:
    • Prima (Bamboo) ;
    • Um Wow Studio (Sea Bird) ;
  • Chipboards:
    • Scrapmatts (Marine Life 02) ;
    • Dusty Attic (Mini Shells DA0559) ;
    • Um Wow Studio (Sand Dollar, Explore Tags) ;
  • Fleurs / Flowers - Wild Orchid Crafts (Magnolias, Cosmos Daisies) ;
  • Tampons / Stamps - 7 Dots Studio (Destination Unknown) ;
  • Archival Ink - Ranger (Watering Can) ;
  • Crackle Accent - Ranger ;
  • Art Ingredients - Prima Finnabair (Glass Glitter: Platinium) ;
  • Art Extravagance - Prima Finnabair (Crackle Pastes: White, Clear) ;
  • Art Basics - Prima Finnabair (Heavy Gesso: White, 3D Matte Gel, Soft Matte Gel)
  • Gaze / Cheese Cloth.

mercredi 22 avril 2015

Baby Cards - Maja Design DT

Bonjour à toutes,

Aujourd'hui je suis le blog de Maja Design avec deux petites cartes de naissance.

Hello Sweeties

Today I'm up on Maja Design blog with two simple birth cards.


It's a boy ...


C'est une petite carte très simple à faire. Les papiers sont si beau qu'il suffit de les couper à la bonne dimension, de les assembler et, d'ajouter quelques fleurs ... Désolée, je ne peux pas m'en empêcher :)

It's really a simple thing to do. The papers are so beautiful that you just need to cut some of papers, glue them together and well add some flowers ... Well I can't help myself: I'm a flower girl.


Chaque papier de chez Maja Design a une jolie bordure. J'ai découpé celle avec les petits éléphants qui borde "Special Delivery" pour l'ajouter à ma carte.

Each Maja Design paper has a border that is really nice. I cut the cute elephant border from the "Special Delivery" paper to add to my card.


It's a Girl ...


Comme la carte pour le petit gars, j'ai simplement collé différents papiers ensembles, ajouter quelques fleurs, un ou deux embellissements en bois et c'est tout.

Like the baby Boy card, I just glue different papers together, add a few flowers, one or two wood embellishments and that's all.


Matériels / Materials:

Maja Design papers:
  • Vintage Baby - First Teddy Bear (Baby Boy Card)
  • Vintage Baby - Precious (Baby Girl Card)
  • Vintage Baby - Ephemera Cards
  • Vintage Baby - Die Cuts
  • Vintage Baby - 6x6 pad
Other products:
  • Pochoirs / Stencils:
    • Prima (Floral Petites 6x6)
    • TCW (Specimens 6x6).


Prima DT Call

Bonjour à toutes,

Voilà j'ai hésité longtemps, et puis je me suis dit qui ne tente rien n'a rien. Alors je pose ma candidature et advienne ce que pourra.

Hello Sweeties

Well I hesitated for a long time, and but it's worth a try. So I apply and come what may.


Quelques pages ... / A few pages ...


Quelques tableaux ... / A few canvas ...


Art 


Et d'autres projets ... / And more projects ...


Another layout
Journal page
Altered frame

lundi 20 avril 2015

Memory - Kit pour The Scrapbook Diaries DT

Bonjour à toutes,

Aujourd'hui j'ai une super nouvelle à partager avec vous : Janene de TheScrapbookDiaries m'a demandé de lui créer une page avec un kit et une vidéo pour la réaliser.

Hello Sweeties

Today I have a great news to share with you: Janene from TheScrapbookDiaries asked me to put together a kit to create a page and the video to make it. 


J'ai une fois encore travaillé sur une photo de famille. Il s'agit cette fois de mon grand-père Nicolas Joseph en compagnie de sa mère et de ses deux soeurs.

Once again I choose to work with a family photo. It's a photo of my grand-father Nicolas Joseph with his mother and his two sisters.


J'ai travaillé le fond de ma page avec des Mica Powders, de la pâte à craqueler, du gel brillant 3D.

I worked on my background mostly with Mica Powders, Crackle Paste and 3D Gloss Gel.


Quelques magnifiques fleurs de la collection Timeless Memories ...

Some beautiful flowers of the Timeless Memories collection...


...  quelques embellissements métalliques et quelques glitters, et nous y voilà. J'espère que cela vous donne envie.

... some metallic embellishments and some Glass Glitters, and here we are. I hope that it tempts you.


Matériels / Materials:
  • Papier / Paper - Prima (Timeless Memories) ;
  • Fleurs / Flowers - Prima (Joyous, Timeless Memories - Retrospect, Refection, Remembrance) ;
  • Embellishments - Prima (Vintage Keys, Mechanicals Flowers) ;
  • Chipboard - 13 Arts (Small Ornemental Mat) ;
  • Silks - ColourArte (Teal Zircon) ;
  • Tampon / Stamp - The ScrapBook Diaries (Beauty and Grunge November 2014) ;
  • Pochoir / Stencil - TCW (Tattered Lace 12x12) ;
  • Art Ingredients - Finnabair Prima (Mica Powder - Rust, Teal, Glass Glitter - Copper) ;
  • Art Extravagance - Finnabair Prima (Crackle Paste - White) ;
  • Art Basic - Finnabair Prima (Heavy Gesso - White, 3D Gloss Gel, 3D Matte Gel, Soft Matte Gel).

Dare to spread .... - Mixed Media Place challenge

Bonjour à toutes,

Le Creative Gym Challenge #7 de Mixed Media Place est ouvert.

Hello Sweeties,

The Creative Gym Challenge 
 #7 of Mixed Media Place is  open.


Ce mois-ci, c'est Gayle qui vous défie avec The Power of One - Utiliser 1 pochoir et 1 tampon, ensuite choissisez une couleur, rouge par exemple, vous pourrez alors utiliser peinture, encres, crayons, perles, glitter, embellissements, etc de cette couleur, vous pourrez également utiliser le noir et le blanc (par exemple votre photo).
Qu'en pensez-vous ? Partante pour ce nouveau challenge ?


This month, it's Gayle who challenge you with The Power of One - use 1 stencil and 1 stamp then pick 1 colour - say red, then you can use red paint/mists/inks/pencils/beads/glitter/ embellishments etc, plus black and white everything as well (for example when choosing a photo).
What do you think? Is anyone up for a good challenge?


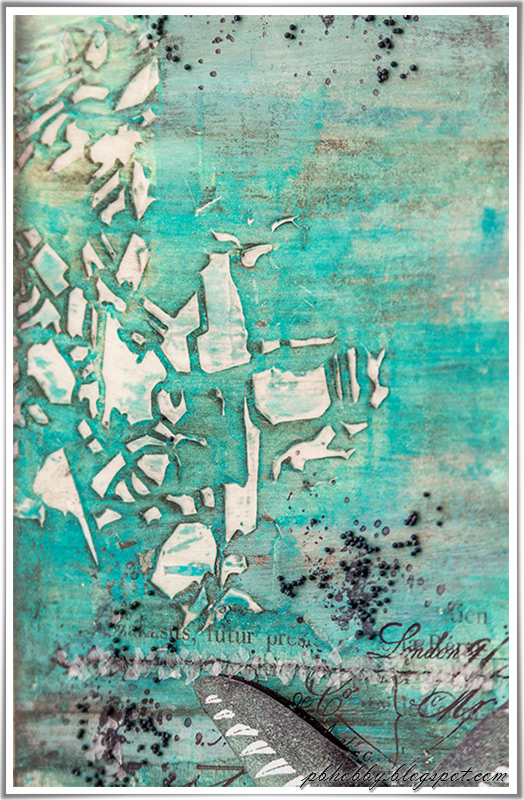
J'ai commencé par coller du scotch de masquage et quelques morceaux de vieux livres sur mon papier. Puis j'ai ajouté un motif avec un pochoir et du gel 3D brillant. Une fois sec, j'ai utilisé deux peintures turquoises, une acrylique et l'autre une Silks, pour colorer mon fond ainsi que des Gessos blanc et noir pour ajouter de la profondeur. A l'aide d'une lingette, j'ai enlevé la peinture du motif.

I began to glue some masking tape and some scraps of book pages to my background.Then I a design with a stencil and 3D Gloss Gel. When dry, I used two turquoise paints: one a acrylique the other a Silks glaze , to color my background, I Added some white and black watered gesso to added some depth. With a baby wipe I removed the paint of the design. 


J'ai ensuite tamponné un motif. J'ai répété partiellement à plusieurs endroits sur ma page une partie du motif : les taches. Pour accentuer l'effet, j'ai collé des micro-billes noires aux mêmes endroits avec du gel medium mat. J'ai tamponné le papillon central sur un autre papier et je l'ai coloré avec des Mica de couleur Teal pour le faire ressortir avant de le coller en relief sur ma page.

Then I stamped a design. I repeated partially in differents places of my page a part of the design: the stains. In order to accent them I glued some black micro beads at the same places with Soft Matte Gel. I stamped the main butterfly on a piece of paper and I colored it with a Teal Mica Powder so it stand out before gluing it on my page. 


J'ai également ajouter des Glitter sur une partie de motif principal. J'ai imprimé le titre et l'ai collé avec du gel medium mat. J'ai utilisé un crayon aquarellable noir pour le mettre en valeur.

I also added some pearl Glitter on the main design. I printed the sentiment and I glued it with Soft Matte Gel. I highlighted it with a black watercolor pencil.


Matériels / Materials:

jeudi 16 avril 2015

Colisée - 7 Dots Studio + Video

Bonjour à toutes,

Aujourd'hui je suis sur le blog de 7 Dots Studio avec un nouveau projet et un pas-à-pas en vidéo. J'ai pris cette photo du Colisée lors d'un séjour à Rome.

Hello Sweeties

Today I'm up on 7 Dots Studio blog with a new project and a step-by-step video. I take this photo of the Colisseum when I was in Rome. 


J'ai fait une vidéo qui vous montre comment j'ai réalisé cette page. Mais avant quelques gros plans :

I realized a video showing how I made this layout. But first some close-ups:


Matériels / Materials:

7 Dots Studio products:
Other products:
  • Art Extravagance - Finnabair Prima (Graphite Paste)
  • Art Ingredient - Finnabair Prima (Mica Powder Rust)
  • Art Basics - Finnabair Prima (Heay Gesso: White &
  • Black, 3D Matte Gel, Soft Matte Gel)
  • Twinkling H2Os - Colour Arte (Orange Peel, Ginger Peach, Yellow Rose, Wild Vine,
  • Flowers - WOC (Magnolia, Tulip, Cosmos Daisy)
  • Chipboard - Dusty Attic (Brick Wall)
  • Die - Memory Box (Botanical Stem);
  • Die - Die Version (Lady Liberty)
Related Posts Plugin for WordPress, Blogger...